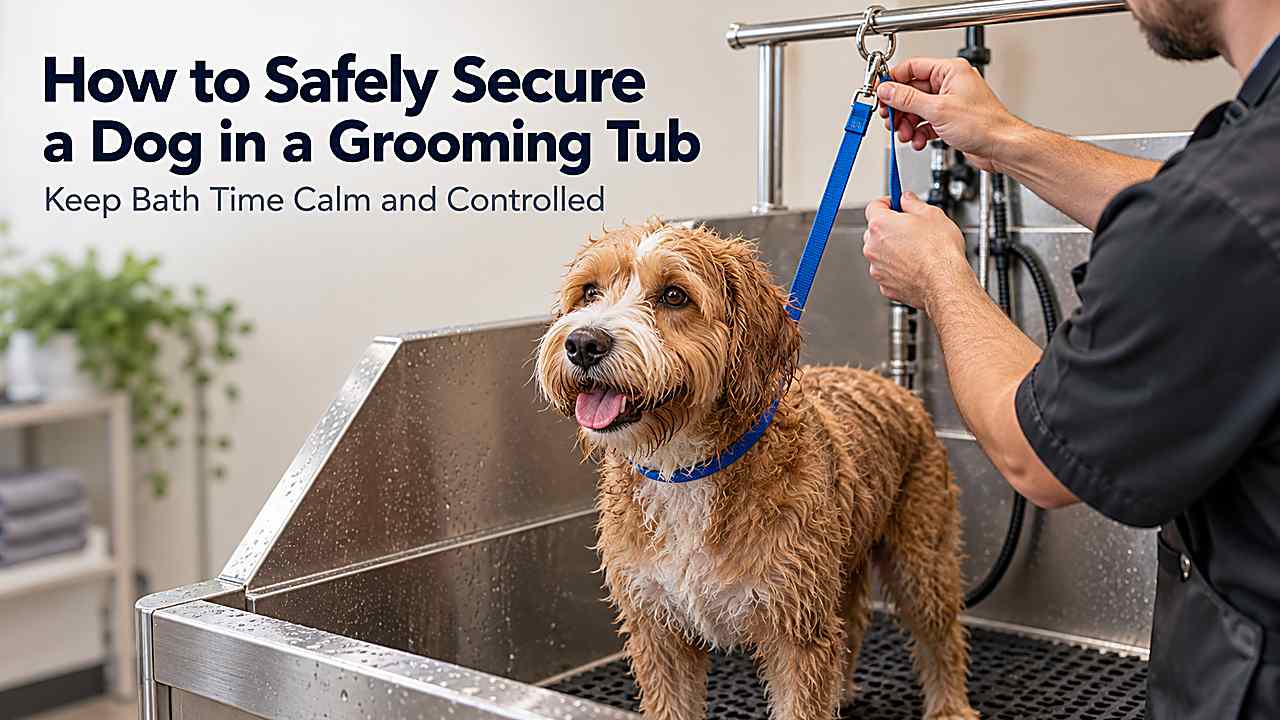
A grooming tether can prevent a dog from jumping out of a raised tub, but poor adjustment can create choking, entanglement, or panic. The restraint should support safe positioning while you remain actively supervising the dog.
A strong result comes from choosing the least stressful method that still gets the dog clean. Coat type, age, skin health, mobility, and previous grooming experiences all change how quickly you should move and which tools make sense.
Attach the dog to the tub’s designated grooming restraint at a length that allows a natural stand but prevents jumping out. Use quick-release equipment when provided, supervise constantly, and never use the tether to overpower panic.
Prepare before you start
Preparation shortens the wet part of the session and prevents the common mistake of leaving a dog unattended while you search for supplies. Set up the space first, then bring the dog into it.
- Inspect the tub’s tether point, loop, clip, and quick-release hardware before use.
- Use equipment designed for grooming, not an improvised rope around the neck.
- Place a non-slip mat under the dog before attaching restraint.
- Keep the dog within arm’s reach on a raised surface.
- Know how to release the tether immediately if the dog slips or panics.
If you notice open wounds, painful swelling, severe matting, infected-looking ears, breathing trouble, or a level of fear you cannot manage safely, postpone the routine bath and get appropriate professional advice.
Restraint does not replace handling
A grooming loop is a safety backup, not a device for forcing cooperation. Calm hands, predictable movement, non-slip footing, and reward-based handling reduce how much the dog tests the restraint.
If a dog repeatedly tries to bite, climb out, or choke itself against the loop, the session is no longer a routine DIY bath. Seek professional help rather than escalating restraint.
Collar, loop, and harness considerations
Facilities use different restraint systems. Some loops sit around the neck, while others can be configured to reduce pressure or add support. Follow the manufacturer’s and facility’s instructions rather than improvising.
Dogs with airway disease, neck injury, brachycephalic anatomy, or orthopedic problems may require specialized restraint. Ask a veterinarian or experienced groomer if you are unsure.
Step-by-step routine
Work in a consistent order so the dog knows what happens next. Short, controlled stages also make it easier to pause if the dog becomes uncomfortable.
1. Use the station’s intended attachment point
Clip only to the grooming arm or anchor designed for restraint. Do not wrap a leash around pipes, faucets, doors, or equipment that could move or trap the dog.
Pro tip: Keep treats, shampoo, and drying tools on the same side of the tub so you can maintain one-hand contact with the dog.
2. Adjust for a natural standing posture
The dog should be able to stand comfortably and shift weight without constant neck pressure. At the same time, the tether should be short enough that the dog cannot climb over the tub wall or get a leg tangled in excessive slack.
Pro tip: If the dog stops taking a favorite treat, lower the intensity before continuing.
3. Keep the dog supervised
A tethered dog on a raised surface is never safe to leave alone. Keep supplies within reach before you start so you do not have to walk away for shampoo or towels.
Pro tip: Use your free hand to separate thick coat so water and airflow reach the skin without increasing pressure.
4. Respond to panic by reducing pressure
If the dog spins, hangs against the restraint, gags, or tries to leap, stop the wash and stabilize the dog. Release or reposition the tether as needed rather than tightening it.
Pro tip: Check the dog’s skin temperature and footing every few minutes rather than waiting until the end.
5. Remove restraint before lifting or exiting
Control the dog with a leash or helper as appropriate, then disconnect the tub tether before guiding the dog down a ramp or out of the tub. Avoid creating a moment where the dog jumps while still attached.
Pro tip: Finish one body zone completely before moving on so you do not lose track of rinsing or drying.
Large and mobility-limited dogs need extra planning
A dog that cannot jump safely should use a ramp, steps, or floor-level wash station where available. Lifting a heavy dog into a tub can injure both dog and owner.
Call the facility before visiting to ask about tub dimensions, ramp access, and whether staff can assist with entry or exit.
Cooperative care is a long-term shortcut
Teaching the dog to step onto a mat, enter a tub, accept brief restraint, and tolerate handling creates faster future baths than repeatedly overpowering resistance. Train these pieces when the dog is dry and the equipment is off.
Use small increments and stop while the dog is still successful. The bath itself then becomes a familiar sequence rather than a collection of surprises.
Self-serve wash safety that applies to every dog
Even when the article focuses on one coat or grooming problem, the basic safety rules do not change. The station should reduce physical strain and mess, not encourage you to rush or use stronger restraint than you would at home.
Read the dog before you read the timer
Self-serve stations often run on a timer, but the dog sets the safe pace. A nervous dog may need thirty seconds to settle before water starts, while a confident dog may be ready immediately. Rushing because paid time is counting down can turn a simple wash into a handling problem.
Watch posture, breathing, willingness to take food, and attempts to escape. If stress keeps rising, simplify the task, lower water pressure, move away from noisy equipment, or stop. Paying for another session is cheaper than creating an injury or a lasting fear of grooming.
Protect eyes, ears, and footing
Keep strong spray and shampoo away from the eyes and inside the ears. Clean the face with a damp cloth when practical, and dry the outer ears after bathing. A rubber mat or textured tub floor is equally important because wet paws on stainless steel can slide suddenly.
Gather supplies before you begin so the dog is never left alone in a raised tub. If you use a grooming tether, treat it as backup restraint rather than permission to step away.
Rinse more than you think you need to
Residual shampoo is a common avoidable cause of post-bath itch and dull-feeling coat. Work from the neck backward and rinse in sections until the water runs clear and the hair no longer feels slick.
Dense undercoats, armpits, groin, tail base, feathering, and skin folds need extra attention. If you used conditioner, follow its label and rinse to the recommended level rather than guessing.
Common mistakes to avoid
Most bath problems come from rushing, using the wrong product, or continuing after the dog has stopped coping. Avoid these shortcuts even when the dog is very dirty or the timer is running.
- Starting with full water pressure on the face or ears.
- Using human shampoo because the dog is especially dirty.
- Scrubbing tangles or gritty mud harder instead of removing debris first.
- Leaving shampoo in dense areas of the coat.
- Using hotter dryer air to finish faster.
- Leaving a tethered dog unattended on a raised surface.
- Continuing after the dog is panicking, choking against restraint, or at risk of biting.
A slower, organized wash is usually faster overall because you do not have to repeat rinsing, untangle a stressed dog, or correct irritation afterward. If one step is not working, change the method instead of adding force.
A practical finishing checklist
Before you leave the wash area or consider the job finished, pause for a full nose-to-tail check. The dog should be standing comfortably on secure footing, the coat should feel free of slippery shampoo residue, and no area should be dripping enough to soak bedding or stay wet for hours. A final check takes only a few minutes and catches many problems while they are still easy to fix.
Run your fingers through dense areas rather than judging dryness from the surface. Feel behind the ears, under the collar area, in the armpits, along the belly, at the tail base, between the toes, and through any long feathering. If the hair close to the skin feels cool, clumped, or heavy, it probably still holds moisture and needs more drying.
Check the dog’s skin and behavior at the same time. Mild tiredness after a grooming session can be normal, but limping, persistent trembling, repeated head shaking, frantic scratching, facial swelling, hives, vomiting, breathing changes, or obvious pain are reasons to stop treating the issue as ordinary grooming. Rinse away any suspected product residue and contact a veterinarian when signs are significant or persistent.
Pack wet brushes and towels separately from clean equipment, and follow the station’s posted cleanup rules. Wash reusable towels and brushes before the next session so dried shampoo, hair, mud, or skin oils do not get carried back onto the dog. A clean kit makes future baths faster and reduces the chance of introducing debris into freshly washed coat or sensitive skin.
Finally, make one mental note about what worked. Maybe the dog tolerated lower airflow, entered more easily with a ramp, stayed calmer when the face was cleaned last, or needed much more rinsing than expected. Turning those observations into the next routine is how grooming becomes easier over time rather than starting from zero at every bath.
How to know the bath worked
A successful bath leaves the coat clean without obvious residue, the skin comfortable, and the dog able to recover normally after grooming. Run your hands over the coat after drying and check the paws, belly, armpits, tail base, and behind the ears for dampness, missed dirt, tangles, or irritation.
Watch the dog during the next several hours. Persistent scratching, redness, hives, strong odor, head shaking, pain, vomiting, breathing changes, or unusual weakness are not normal finishing details. Rinse away suspected product residue and contact a veterinarian when symptoms are significant or do not settle.
Keep notes when a particular shampoo, dryer setting, station layout, or handling technique works well. Repeating a predictable routine can make future grooming easier for both dog and owner, especially for dogs that are sensitive to noise or restraint.
Frequently Asked Questions
How tight should a grooming loop be?
It should prevent escape without creating constant choking pressure. The exact adjustment depends on the system, so follow its instructions and supervise continuously.
The safest choice also depends on the individual dog’s coat, skin, age, health, and behavior, so adjust the general rule when your veterinarian, groomer, or product instructions provide more specific guidance.
Can I leave my dog tied while I get supplies?
No. Gather supplies first and never leave a dog unattended while restrained in a tub or on a grooming surface.
The safest choice also depends on the individual dog’s coat, skin, age, health, and behavior, so adjust the general rule when your veterinarian, groomer, or product instructions provide more specific guidance.
What if my dog tries to hang from the loop?
Support the dog immediately, reduce or release restraint as appropriate, and stop the session. A dog that panics against the loop needs a different handling plan.
The safest choice also depends on the individual dog’s coat, skin, age, health, and behavior, so adjust the general rule when your veterinarian, groomer, or product instructions provide more specific guidance.
Is a regular leash good enough?
Use the equipment the station provides or grooming restraint designed for the task. Improvised knots and attachment points can create entanglement and release problems.
The safest choice also depends on the individual dog’s coat, skin, age, health, and behavior, so adjust the general rule when your veterinarian, groomer, or product instructions provide more specific guidance.
Conclusion
How to safely tie a dog in a grooming tub becomes much easier when you prepare the dog and equipment first, use dog-specific products, control water and restraint carefully, and give rinsing and drying enough time. The fastest routine is the one that avoids creating a second problem such as fear, residue, matting, skin irritation, or incomplete drying.
Use the practical steps above as a baseline, then adapt them to your dog’s coat and comfort. When behavior, skin, ears, mobility, or contamination moves beyond ordinary grooming, stop the DIY process and involve a qualified groomer or veterinarian.