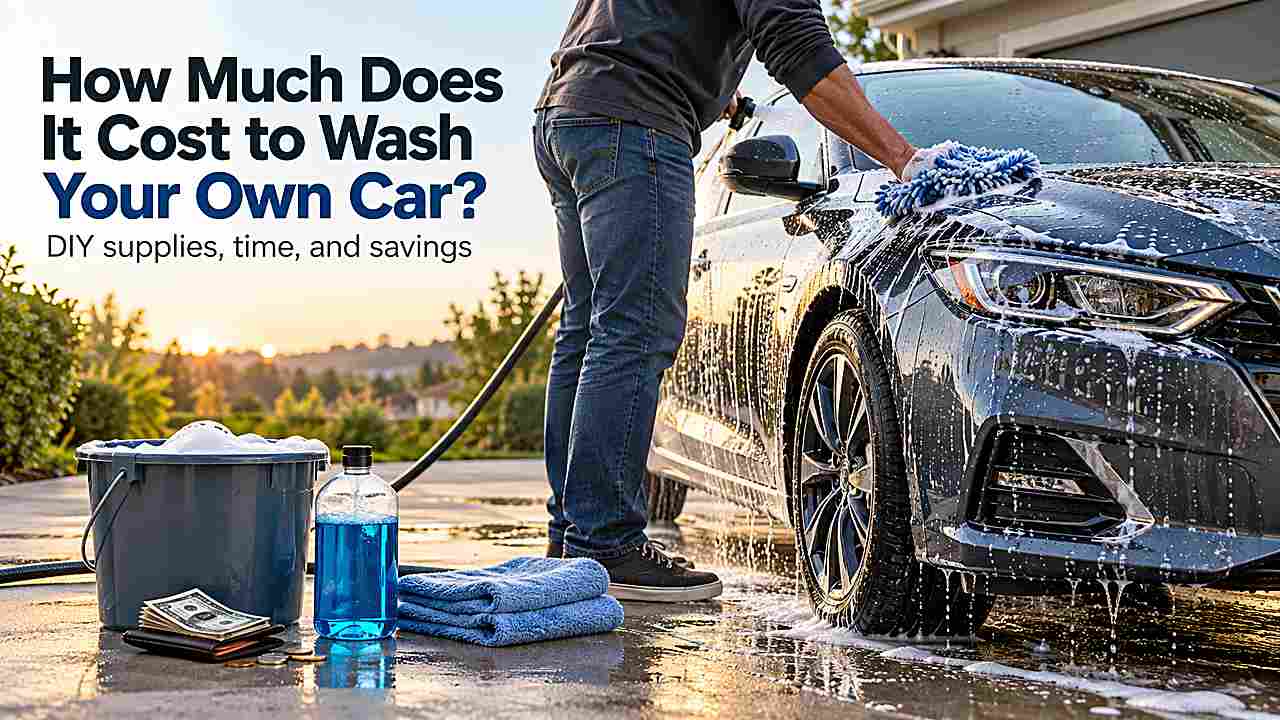
Washing a car yourself can cost only a few dollars, or it can become surprisingly expensive once you add wash-bay time, towels, soap, wheel cleaner, and drying products. The useful number is not a single national average, but the total cost for the way you actually plan to wash.
For most drivers, a self-service bay is the easiest DIY option to price because you buy timed access to water, pressure, soap, and rinse settings. Washing at home shifts more of the cost into reusable tools and your own water and products.
A typical self-service wash often lands around $5 to $15, while a home wash may cost only a few dollars in consumables after you own the basic equipment. Your real cost depends on vehicle size, wash time, local bay pricing, and which products you bring yourself.
What you actually pay for at a self-service car wash
Most self-service bays charge for time rather than for a fixed wash package. You pay an initial amount that starts the timer, then add time with coins, a card, or an app while you switch between functions such as pre-soak, high-pressure soap, rinse, wax, and spot-free rinse.
Current U.S. price guides commonly place a basic self-serve visit in roughly the $5 to $15 range, with very quick rinses sometimes costing less and larger or dirtier vehicles costing more. Local pricing matters more than a national average, so read the payment panel before you start.
| Wash goal | Typical spend | What it usually covers |
|---|---|---|
| Quick rinse | $3-$6 | Loose dust, pollen, light road film |
| Standard wash | $5-$10 | Pre-rinse, soap, thorough rinse |
| Thorough wash | $8-$15 | More dwell time, wheels, final rinse |
| Large or very dirty vehicle | $12-$20+ | Extra cycles and longer rinsing |
Treat these as planning ranges rather than guaranteed prices. A bay in a high-cost city can charge more, while an older coin wash may charge less but provide shorter cycles or lower pressure.
The hidden costs of washing a car at home
A driveway wash feels free because there is no timer, but you still pay for water, soap, towels, mitts, wheel tools, and replacement supplies. The first wash is usually the most expensive because reusable equipment has to be purchased up front.
A basic home kit can include a bucket, grit guard, microfiber wash mitt, drying towel, car shampoo, wheel brush, and a few utility towels. You can spend modestly on a functional kit or much more on premium microfiber, pressure washers, foam cannons, blowers, and specialty chemicals.
Once you own the reusable tools, the cost per wash drops sharply. Shampoo, wheel cleaner, drying aid, laundry, and water become the main recurring expenses.
How to calculate your real cost per wash
Use a simple formula: recurring consumables plus the portion of reusable equipment you expect each wash to consume. If a $20 drying towel lasts 100 washes, for example, its equipment cost is only about 20 cents per wash before laundering.
Do the same with mitts, brushes, buckets, and a pressure washer if you bought one mainly for car care. This method gives you a more honest comparison with automatic or full-service washes than pretending reusable tools are free.
A simple DIY cost formula
- Bay fee or home water cost
- Soap and chemical used during that wash
- Microfiber laundering cost
- Small share of reusable tool cost
- Optional vacuum, tire dressing, wax, or sealant
What makes a self-serve wash cost more
Vehicle size is the biggest obvious factor. A long-bed truck, three-row SUV, van, or lifted vehicle takes more time to rinse and more walking around the bay than a compact sedan.
Dirt level matters just as much. Heavy mud, winter salt, bugs, brake dust, and neglected lower panels need more pre-rinsing and may require a second paid cycle. Trying to beat the timer by moving the nozzle too close or scrubbing aggressively can save a dollar while creating expensive paint damage.
Your sequence also changes the bill. If you spend paid time searching for a towel, reading labels, or untangling the hose, you are paying for preparation that could have happened before the timer started.
How to spend less without rushing the wash
Prepare before you pay. Put towels, mitts, wheel tools, and payment within reach, remove loose items from the bed of a truck, and decide which bay functions you actually intend to use.
Use the high-pressure rinse for the jobs it does best: removing loose contamination and flushing soap from seams. Skip add-ons that do not fit your maintenance plan, especially if you already use a dedicated wax, sealant, or ceramic topper at home.
If the vehicle is extremely dirty, budget for another cycle instead of trying to scrub faster. Safe technique is cheaper than paint correction.
Is washing your own car actually cheaper?
It usually can be, especially if you wash regularly and reuse good tools. A disciplined self-serve routine may cost less than repeated premium automatic washes, while a home wash can become very inexpensive per visit after the setup cost is absorbed.
However, DIY is not automatically the cheapest option for everyone. Apartment residents may need a paid bay, water restrictions can limit home washing, and someone who buys many specialty products may spend more than a simple tunnel-wash customer.
The better comparison is cost per acceptable result. If a cheap wash leaves water spots or scratches that you later correct, the low sticker price was not actually low.
When paying more makes sense
Extra wash time is worth buying when soap is drying, road salt remains in seams, wheel wells are still packed with dirt, or a large vehicle has not been fully rinsed. These are cases where finishing correctly prevents later work.
Professional detailing also makes sense when the job goes beyond routine washing. Paint correction, deep interior extraction, severe contamination removal, and coating installation require time, equipment, or skill that a timed bay cannot provide.
Use DIY washing for maintenance and pay for specialized work when the problem is specialized.
How to make the process more predictable
A repeatable routine is safer than improvising once the timer is running. For this DIY wash budget, set out payment, towels, mitts, and wheel tools before the timer starts. That preparation removes decisions from the paid part of the wash and gives you more time to watch what the surface is doing instead of watching the countdown clock.
Work in a fixed order and keep clean tools physically separate from dirty ones. Move from the cleaner upper or more sensitive areas toward the dirtier sections, and treat paint, glass, wheels, trim, and lower panels according to their own needs rather than using one brush or one chemical everywhere. Cross-contamination is a common reason a wash that looks careful still creates fine scratches or streaks.
Use chemical strength as a last variable, not the first. In most maintenance situations, the better starting point is to buy only the chemicals you actually use instead of paying for every bay add-on. Give the product the label-recommended dwell time, keep it from drying, and add gentle agitation where appropriate before deciding that a stronger product or closer pressure is necessary.
Pressure should remove loosened contamination, not compensate for poor preparation. If an area does not respond to a normal rinse, identify what is actually on it before moving the nozzle closer. Mud, oily film, mineral deposits, sap, brake dust, and bonded fallout are different problems and they respond to different methods.
Build a small margin into the wash. An extra paid cycle, another clean towel, or a few minutes of cooling time is cheaper than fixing damage caused by rushing to save a few dollars. The goal is not to finish in the fewest possible minutes; it is to finish without creating a second problem that requires correction later.
When the wash is complete, record what you spent and which paid functions were actually useful. That final inspection turns each visit into useful feedback. If the same problem appears repeatedly at one facility, change the process, change the product, or choose a different bay rather than assuming you simply need to scrub harder next time.
Common mistakes that make the job harder
Starting on a hot or heavily contaminated surface
Heat shortens working time and heavy loose grit increases abrasion risk. Cool the surface when needed, remove loose contamination first, and never allow soap or specialty cleaner to bake onto the panel while you organize tools or add payment.
Using one tool for every part of the vehicle
The dirtiest areas should not share wash media with the most delicate ones. Wheels, tires, lower trim, exhaust areas, and engine grime deserve separate brushes or towels so abrasive contamination does not travel back to paint, graphics, glass, or coated surfaces.
Treating the pressure wand like a scraper
A close jet can damage weak paint, seals, decals, electrical parts, soft plastics, radiator fins, and other vulnerable components. If normal pressure from a sensible distance does not remove a mark, change the chemistry or method instead of moving dangerously close.
Letting the timer control the technique
When the countdown is nearly finished, people often rush rinsing or start scrubbing more aggressively. Buy more time if soap remains on the vehicle. A complete rinse is more important than saving the cost of one additional cycle.
Skipping a clean final inspection
Look at the vehicle from more than one angle before leaving. Direct light can reveal spots and scratches, while shade can reveal soap film and streaks. Fix a simple rinse or drying issue immediately while the surface is still accessible.
Packing wet and dirty tools together
A clean wash next week starts with how you pack today. Keep wheel towels, greasy brushes, and damp utility microfiber away from paint towels. Launder reusable microfiber properly and store it dry so old contamination is not carried into the next wash.
A practical checklist before you leave
- Confirm that all soap, cleaner, or protectant has been rinsed according to its directions.
- Check mirrors, badges, seams, handles, vents, and trim for trapped water or chemical residue.
- Keep clean drying media off the floor and away from wheel or engine tools.
- Inspect the most vulnerable surface or component for new streaks, lifting, moisture, or damage.
- Move to a designated drying or vacuum area instead of occupying the wash bay after rinsing is finished.
- Make a quick note of what worked so the next visit is faster without becoming more aggressive.
Know when to stop and finish the problem later
A self-service bay is excellent for routine cleaning, but it is not the right place to solve every defect. If a stain, bonded contaminant, leak, damaged finish, electrical concern, or specialty surface is not responding to a safe first method, stop escalating pressure or chemistry just because the timer is running. The next step may be a dedicated product, a controlled home-detailing process, or professional repair rather than a stronger wash setting.
This matters because many expensive mistakes happen after the vehicle is already mostly clean. Once loose dirt is gone, remaining marks can look like something that simply needs harder scrubbing. In reality, they may be mineral etching, oxidation, adhesive residue, failed clear coat, damaged sealant, embedded contamination, or a mechanical leak. More force does not correct those problems and can turn a visible defect into permanent surface damage.
Use the wash bay to create a clean baseline. Rinse thoroughly, dry enough to inspect, and look at the remaining issue in good light. If the mark has texture, color change, lifting edges, cracking, or evidence of a leak, treat that observation as diagnostic information. Taking a photo before trying another method can also help you compare whether the condition is improving or getting worse.
A good DIY routine therefore includes a stopping point. When you cannot identify the problem confidently, leave it alone until you can check the vehicle or product manufacturer’s guidance. Finishing one wash with a small unresolved spot is usually cheaper than correcting scratched paint, damaged graphics, stained trim, a water-filled connector, or a loosened seal caused by trying to force a result.
Frequently Asked Questions
How much should I bring to a coin car wash?
Bring enough payment for at least one extra cycle beyond your expected wash. For many standard cars, budgeting $10 to $15 provides useful flexibility, but local rates can be lower or higher.
Is a self-service car wash cheaper than an automatic wash?
Often, yes, especially for a quick or efficient wash. The comparison changes if you need many timed cycles or buy several add-ons.
How much does soap cost when washing at home?
The per-wash amount is usually small because automotive shampoos are diluted. Divide the product price by the number of washes the bottle actually provides rather than counting the whole bottle as one wash expense.
Does using my own supplies save money at a self-serve bay?
It can, particularly if the facility allows it and you skip paid brush or protectant cycles. Check posted rules first because some operators prohibit bucket washing or outside chemicals during busy periods.
What is the cheapest safe way to wash a car yourself?
Use a simple kit, wash regularly before dirt becomes severe, prepare before the timer starts, and spend enough time on rinsing and safe drying. Avoid saving money by using dirty brushes or rough towels.
Conclusion
The cost to wash a car yourself is usually modest, but the smartest budget includes more than the coins going into the machine. Count timed bay fees, products, water, and reusable tools, then compare that total with the result you expect. For your next wash, decide on a simple sequence before you start and set a realistic budget with room for one extra cycle if the car needs it.