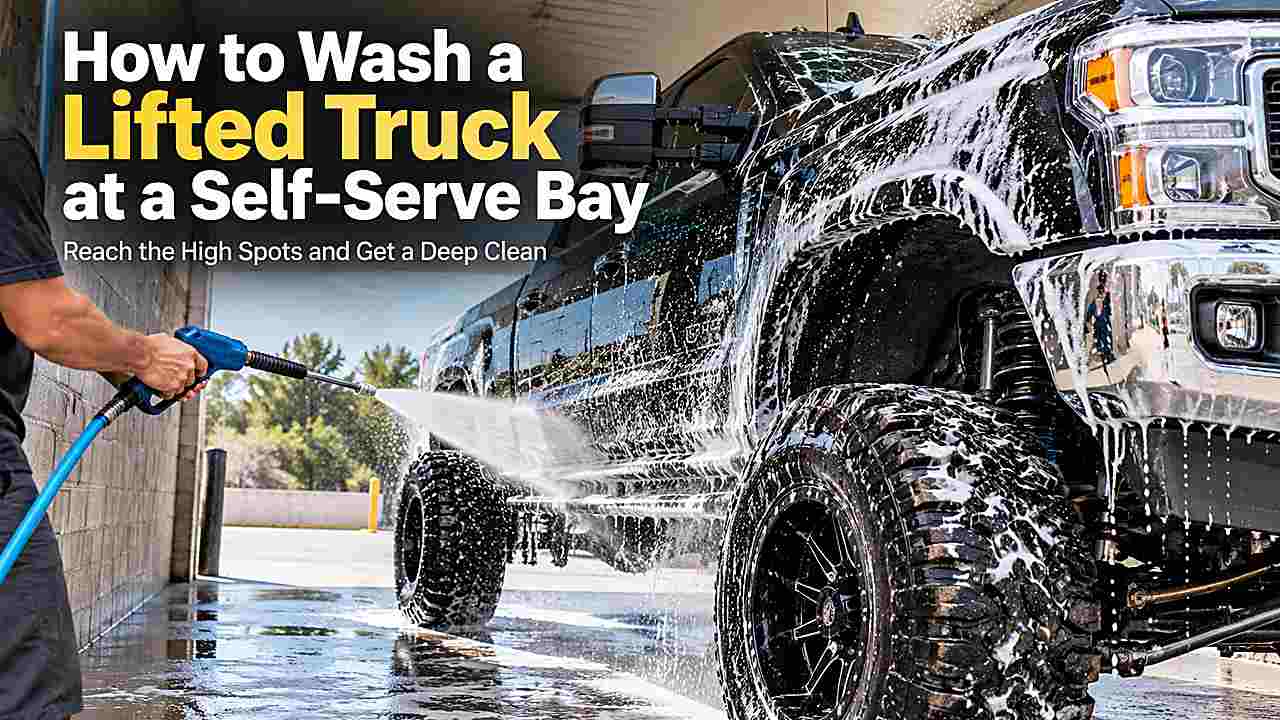
A lifted truck fits the basic self-service wash process, but its height, tire size, wheel-well exposure, and underbody make the job more demanding. You need to think about bay clearance, hose reach, safe access to the roof, and how to remove mud without blasting it into paint or nearby customers.
A good routine starts with the dirtiest underbody areas while keeping contaminated tools away from the body finish.
When washing a lifted truck at a self service bay, confirm height clearance first, pre-rinse heavy mud from wheel wells and underbody, clean wheels with dedicated tools, wash the body top to bottom, use safe access for the roof, rinse thoroughly, and bring enough drying towels for the larger surface area.
Check the bay before you pull in
Lift height, roof racks, antennas, light bars, rooftop tents, and oversized tires can turn a normal bay into a tight fit. Look for posted height limits, overhead booms, hoses, signs, heaters, and other equipment before entering.
If clearance looks uncertain, choose an open outdoor bay rather than testing it with expensive accessories. Also consider whether wide tires or long wheelbase will fit within curbs and drainage channels.
Bring a truck-specific wash kit
A lifted truck has more square footage and more dirt-prone areas than a small car. Bring at least two high-capacity drying towels, separate wheel towels, a wheel/barrel brush, and a safe way to reach the roof if the facility permits it.
Do not stand on wet tires, door sills, bumpers, or a loose folding chair while holding a pressure wand. A stable purpose-built step platform with non-slip feet is much safer on a wet surface.
- Two or more large drying towels
- Separate wheel and lower-body towels
- Wheel-face and barrel brushes
- Stable non-slip step platform if needed
- Optional clean wash mitt if bay rules permit
- Bag or bin for dirty towels
Wash the truck in a mud-smart sequence
Mud changes the order because you want to remove heavy contamination before it can splash onto areas you have already cleaned. Start low, flush the mess away, then reset and wash the body carefully.
1. Rinse wheel wells and underbody
Use controlled pressure to break up mud behind tires, on suspension components, frame rails, skid plates, and steps. Work from angles that send debris toward the drain rather than onto clean body panels or out of the bay.
Avoid forcing water into exposed breathers, electrical connectors, damaged boots, aftermarket electronics, or intake components. Modified trucks can have equipment locations that differ from stock vehicles.
2. Clean wheels and tires
Oversized tires hold a lot of road grime and sidewall residue. Use a tire brush and wheel-safe tools, then rinse completely before moving to paint.
Wheels accumulate brake dust, road film, and oily grime that often need stronger chemistry than painted body panels. The complication is that wheel finishes vary widely. Clear-coated factory wheels tolerate many non-acidic cleaners, while polished aluminum, anodized finishes, damaged clear coat, and specialty aftermarket wheels may require a different product.
When you do not know the wheel finish, choose the least aggressive cleaner, work on cool wheels, and test first. Never assume a bay’s wheel chemical is safe for every aftermarket finish, and do not let cleaner dry on the surface.
3. Pre-rinse the body from the top
Once the heavy lower contamination is gone, rinse roof, glass, hood, bed sides, tailgate, and doors. Pay attention to the rear of the cab and front of the bed where dust and mud can accumulate.
4. Apply soap and use controlled contact
Foam the truck and let chemistry loosen road film without drying. Use a clean personal mitt on body paint if the bay allows it, or minimize contact if the only option is a questionable communal brush.
5. Reach the roof safely
Use a stable platform rather than stretching with one hand on the truck. Keep the pressure hose from dragging across paint and do not lean belt buckles, zippers, or metal tools against the body.
6. Rinse from roof to rocker panels
A tall truck sheds a large volume of soapy water. Give mirrors, bed rails, door handles, flares, steps, badges, hitch areas, and tailgate gaps enough rinse time to stop releasing foam.
7. Finish with spot-free rinse and dry
Use spot-free water if available, then dry the large horizontal and upper panels first. Trucks with bed caps, tonneau covers, and wide mirrors can release trapped water long after the first towel pass.
How to clean wheel wells without making a bigger mess
Wheel wells on lifted trucks are highly visible, so they deserve more attention than on a low car. Pre-rinse thick mud, apply a compatible all-purpose or wheel-well cleaner if allowed, agitate with a dedicated long-handle brush, and rinse from several directions.
Keep wheel-well brushes off paint. Mud can contain sand and small stones that remain trapped deep in bristles even after a quick rinse.
What about the undercarriage?
A self-service wand is useful for flushing loose salt, mud, and road grime from accessible underbody areas. Focus on rinsing rather than trying to make suspension and chassis components cosmetically perfect in a crowded bay.
Modified trucks may have exposed aftermarket wiring, air lines, reservoir breathers, remote shocks, or electronic accessories. Know your build and avoid concentrating high pressure on sensitive parts or fresh grease points.
How to wash around aftermarket accessories
Light bars, winches, bed racks, snorkels, auxiliary cameras, fender flares, decals, and wrap sections all create edges that can catch water and soap. Inspect mounting points and wiring before washing, especially after trail use.
Do not assume ‘off-road’ means every accessory can take a close pressure-washer jet. Use more distance around seals, electrical housings, exposed connectors, and adhesive-mounted parts.
Drying a lifted truck efficiently
Large trucks overwhelm small microfiber towels quickly. Start with the roof while you have safe access, then glass, hood, doors, bed sides, and tailgate. Use a second towel rather than continuing with one saturated towel.
Finish steps, flares, bumpers, hitch areas, and wheels with separate towels. If you have a safe blower, it is especially useful around mirrors, grill openings, badges, bed rails, and accessory mounts.
Common self-service mistakes with lifted trucks
The biggest errors come from underestimating size and contamination. Dragging the hose over a tall fender, using the same muddy brush everywhere, and climbing on wet tires are avoidable risks.
Also be considerate of bay cleanup. Heavy mud can clog drains or leave the bay unusable for the next driver, so follow facility rules and rinse down the bay floor if permitted.
- Ignoring overhead clearance
- Standing on wet tires or bumpers
- Blasting sensitive aftermarket wiring
- Using wheel-well brushes on paint
- Dragging the hose across tall body panels
- Leaving heavy mud on the bay floor
Quick decision guide for real-world conditions
The best approach to washing a lifted truck at a self service bay changes with temperature, contamination level, and the condition of the surface. Use the wash bay as a cleaning system rather than following every dial setting automatically. If a surface is hot, heavily contaminated, damaged, or made from a specialty material, reduce pressure and chemical strength before you increase them.
When a first pass does not remove a mark, identify the problem before repeating the same action with more force. Loose dirt needs rinsing, oily film needs compatible chemistry, bonded contamination may need a dedicated decontamination step, and physical paint defects require correction rather than stronger washing. This simple diagnosis prevents many avoidable scratches and stains.
Weather also changes the routine. In direct sun, work smaller areas and rinse sooner. In cold conditions, be cautious around frozen seals and brittle plastics. In wind, expect dust to settle on wet paint and avoid prolonged air-drying even after a good final rinse.
If the vehicle has a ceramic coating, vinyl wrap, matte finish, aftermarket wheel finish, convertible fabric, PPF, fresh body repair, or specialty graphics, follow the manufacturer or installer’s care instructions ahead of generic wash-bay advice. Compatibility beats convenience when the surface is expensive to repair.
Do not try to recover lost time by scrubbing harder near the end of a paid cycle. It is safer to add another short cycle, rinse again, or finish a stubborn defect later with the correct product than to grind contamination into the surface because the timer is beeping.
A useful habit is to reserve tools by contamination level. Paint gets the cleanest towels and mitts; glass can share clean paint-safe microfiber; lower trim gets a secondary towel; wheels, tires, exhaust, and wheel wells get their own brushes and towels. That hierarchy keeps the dirtiest material moving away from sensitive surfaces rather than back toward them.
After the wash, inspect under direct and indirect light. Sunlight reveals water spots and swirl marks, while diffuse shade can make soap residue and streaking easier to see. Correcting a small rinse or drying issue immediately is easier than discovering it after the vehicle has been parked for several hours.
Finally, keep your wash kit simple enough that you will actually maintain it. A few clean, task-specific tools that are washed and stored correctly are safer than a large collection of brushes and towels with uncertain histories. Clean equipment and controlled technique matter more than owning every detailing accessory.
How to adapt the routine when conditions are not ideal
Real self-service bays are rarely perfect, so washing a lifted truck at a self service bay sometimes requires a small change in plan. If the vehicle arrives unusually dirty, the surface is hot, the bay brush looks contaminated, or a chemical setting is not clearly labeled, choose the lower-risk option rather than forcing the normal sequence.
If time runs out while soap is still on the vehicle, buy enough additional time to rinse it completely. Leaving detergent to dry is a worse tradeoff than spending another short cycle, especially on dark paint, matte finishes, glass, trim, and other surfaces that show residue quickly.
If the bay is crowded, prepare towels, brushes, payment, and personal chemicals before pulling into the stall. That keeps the paid wash focused on rinsing and cleaning, and it lets you move promptly to a designated drying or vacuum area instead of blocking the wash bay while organizing equipment.
If the communal equipment is in poor condition, do not assume you must use every tool provided. A dirty brush can be skipped, an unidentified wax setting can be ignored, and stubborn contamination can be handled later with a known product. The safest wash is often the one that leaves one difficult spot for another day.
When water pressure feels unusually strong, increase nozzle distance and keep the spray moving. When pressure is weak, rely more on dwell time and repeated rinsing instead of moving the nozzle dangerously close to paint, seals, fabric, wheel finishes, or aftermarket accessories.
After any unusual wash, inspect the vehicle before repeating the method next time. Look for new streaking, spotting, gloss changes, residue, or missed contamination. That feedback tells you whether the bay’s soap, brush, water quality, and pressure are suitable for your vehicle rather than relying only on the labels on the control panel.
A consistent routine should make the vehicle easier to maintain, not create new correction work. If you repeatedly leave the same facility with spots, swirls, staining, or chemical residue, change the process or choose a different bay instead of increasing scrubbing pressure or adding more aggressive chemicals.
Frequently Asked Questions
Will a lifted truck fit in a self-service car wash?
Many will, but height and width vary by both truck and facility. Check posted clearance and overhead equipment before entering, including roof racks, antennas, and light bars.
Can I pressure-wash the suspension?
You can rinse many suspension and frame components, but avoid close high pressure on seals, damaged boots, exposed electrical connections, breathers, and fresh lubrication points. Modified components may have their own cleaning instructions.
Should I wash mud off before using soap?
Yes. Thick mud should be softened and flushed away with water first so it does not become abrasive material under a brush or wash mitt.
How many drying towels should I bring?
Two large high-capacity towels are a sensible minimum for many lifted trucks, plus separate towels for wheels and dirty lower areas. Very large crew-cab trucks or vehicles with caps may need more.
Can I use the foaming brush on a truck bed?
It may be useful on durable bed liners if the liner manufacturer allows brushing, but rinse the brush first and do not return it to painted body panels afterward.
Practical checklist before you leave the bay
Before leaving, walk around the vehicle once while it is still in good light. Look for soap trapped below mirrors, water running from badges or trim, missed grime on lower panels, and any towel streaks that are easier to correct now than after they dry.
Keep clean and dirty equipment separated as you pack. Put damp wheel towels and brushes in their own bag, keep paint towels away from the floor, and launder reusable microfiber before the next wash rather than letting residue dry into the fibers.
Finally, make a note of what worked at that particular facility. Self-service bays differ in pressure, water hardness, chemical strength, timer length, brush condition, and spot-free performance, so learning the strengths and weaknesses of a reliable local bay can improve the next wash.
Conclusion
Washing a lifted truck at a self service bay is easiest when you plan around height, mud, and tool separation. Verify clearance, flush the dirty underbody and wheel areas first, then wash body paint with clean media and safe access to high panels.
Bring enough towels and a stable step platform, and know where your aftermarket electronics and accessories are located. That preparation turns a cramped bay visit into a controlled wash rather than a wrestling match with hoses and mud.