Car doors usually freeze after a wash because water remains on weather seals, latch areas, handles, or lock cylinders and then turns to ice. The prevention is mostly drying and seal maintenance, not pulling harder on the door later.
AAA winter guidance specifically recommends maintaining weather strips with silicone and using appropriate lubricants on lock and latch mechanisms.
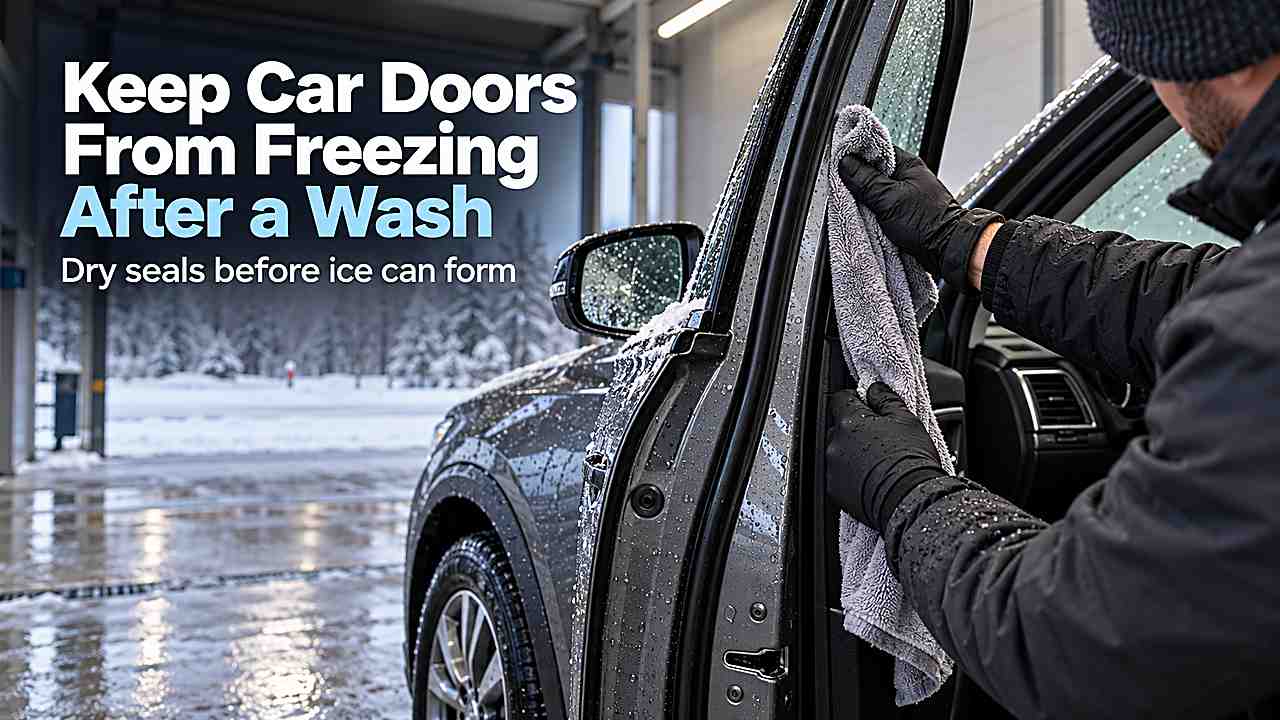
Dry the weather seals, door jambs, handles, and latch areas immediately after the wash, then drive long enough for residual water to drain. Maintain clean rubber seals with an appropriate silicone product and never use hot water to free a frozen door.
Dry the water traps before leaving the wash
Open each door while still in a protected area and wipe the full rubber seal, painted jamb, lower drain area, latch, striker, and handle recess. Do the same for the trunk or hatch and fuel or charging door.
Use a separate dry microfiber for seals so the towel is not already saturated from drying body panels. A wet towel can simply move water around.
Use airflow and time to finish the job
After wiping, a short drive can help move water out of mirror housings and body gaps. If you have a garage above freezing, park there long enough for the doors and seals to finish drying before exposing the vehicle to deep cold.
Avoid washing immediately before an overnight temperature drop if you have no way to dry the car. Midday washing gives trapped water more time to drain.
Maintain seals and locks
Clean weather stripping seals better and freezes less readily than rubber coated with salt and grime. Once dry, an automotive silicone product used according to its directions can help prevent moisture from bonding the rubber surfaces together.
For mechanical lock cylinders and latches, use a lubricant appropriate for the component and vehicle. Do not flood electronic handles, sensors, or switches with improvised sprays.
If the door is already frozen
Do not yank repeatedly on the handle, and do not pour hot water over the door or glass. Try another door, warm the vehicle if accessible, use an appropriate de-icer where suitable, and apply gentle pressure around the door perimeter to break a thin ice bond.
Once the door opens, dry the seals and correct the moisture problem before the next freeze.
Protect weather seals before the next cold wash
Inspect the vehicle after the job. Look for salt still packed in wheel wells, water dripping from trim, frozen wiper blades, fogged lamps, or areas where a protective coating or paint appears damaged. Small problems are easier to address before the next storm.
If the vehicle has fresh paint, cracked clear coat, exposed metal, torn boots, or other damaged components, reduce mechanical and chemical aggression. Winter contamination is important to remove, but damaged materials may need repair rather than harder cleaning.
Quick check before the next step
Confirm that water is draining rather than freezing, visibility equipment is working, and no seal, trim, coating, or component is reacting badly. If conditions are deteriorating, finish the essential task and stop.
Work from the least aggressive method toward stronger intervention only when the surface or condition actually requires it Keep paint-contact tools clean because winter grit and road film can create scratches when rubbed across the finish If runoff is freezing or footing is unsafe, end the job rather than trying to perfect a cosmetic result.
Work from the least aggressive method toward stronger intervention only when the surface or condition actually requires it Keep paint-contact tools clean because winter grit and road film can create scratches when rubbed across the finish.
Work from the least aggressive method toward stronger intervention only when the surface or condition actually requires it.
Change the wash timing to reduce refreezing risk
Prevention reduces the amount of force needed later. Maintain weather seals, touch up paint chips, keep winter washer fluid in the reservoir, and use a compatible wax, sealant, or coating when appropriate for the finish.
A regular light-cleaning schedule is usually easier on paint and components than waiting until a thick crust of salt, ice, and road film has built up. Consistency lets water and mild chemistry do more of the work.
Use the warmest practical part of the day when possible
Keep winter tools clean. A snow brush, microfiber towel, wash mitt, or scraper that has been stored on a gritty floor can transfer abrasive debris to the vehicle. Store paint-contact tools separately from wheel and undercarriage tools.
Replace damaged wiper blades and worn scrapers rather than forcing them to work. A small defect in a winter tool can create scratches, streaks, or poor visibility at exactly the time the vehicle is hardest to clean.
Quick check before the next step
Confirm that water is draining rather than freezing, visibility equipment is working, and no seal, trim, coating, or component is reacting badly. If conditions are deteriorating, finish the essential task and stop.
Work from the least aggressive method toward stronger intervention only when the surface or condition actually requires it Keep paint-contact tools clean because winter grit and road film can create scratches when rubbed across the finish If runoff is freezing or footing is unsafe, end the job rather than trying to perfect a cosmetic result.
Work from the least aggressive method toward stronger intervention only when the surface or condition actually requires it Keep paint-contact tools clean because winter grit and road film can create scratches when rubbed across the finish.
Work from the least aggressive method toward stronger intervention only when the surface or condition actually requires it.
Check every door, handle, mirror, and fuel door before parking
Before the temperature drops, open each frequently used door once and inspect the weather seal for visible water. Dry the rubber seal, painted contact surface, latch area, and lower door edge with a clean towel, then make sure the door closes normally. Repeat the same check on the trunk or hatch and on the fuel or charge door if it was rinsed heavily.
If your vehicle manufacturer permits a weather-seal conditioner, use only a product designed for automotive rubber and apply it sparingly to a clean, dry seal. Do not coat locks, latches, or painted surfaces with random oils that can collect dirt or interfere with mechanisms. The goal is simple: remove trapped water first, then maintain healthy seals so they stay flexible and release cleanly in freezing weather.
Weather seals are only one water trap. Door-handle recesses, key cylinders, latch openings, the lower edge of the door, and the gap where the glass meets the belt molding can all retain moisture. Use a clean towel and, where appropriate, gentle compressed air or a vehicle-safe blower to move water out without forcing it deeper into electrical components.
Pay particular attention to vehicles with frameless glass. The glass may need to drop slightly before the door opens, and a frozen edge can prevent that movement. Dry the upper glass edge and the corresponding seal before leaving the wash, then avoid forcing the handle if the glass is obviously bonded by ice later.
If a door freezes despite your precautions, patience usually causes less damage than force. Warming the cabin, parking in a warmer place, or using an automotive de-icer on the appropriate area can release ice gradually. Pulling hard on the handle can damage trim, cables, or the weather seal before the ice bond breaks.
Clean seals are easier to dry than seals packed with grit. During winter, wipe dirt from the rubber periodically with a damp cloth and dry it before applying any compatible seal-care product. Grit trapped against the rubber can also abrade paint at the contact line over repeated opening and closing.
Make the drying routine automatic after every winter wash. Open each door, wipe the seal and jamb, dry the handle area, and check the latch before moving to the next door. A two-minute sequence repeated consistently is more reliable than trying to solve a frozen door on a cold morning.
Door seals can look dry on the visible face while water remains in the channel behind them. Press a towel gently into the corners and lower sections where runoff collects, but do not pull the seal away from its mounting if it is not designed to be removed. Repeatedly disturbing an old seal can create leaks that are harder to solve than the original freezing problem.
If the car is parked outside overnight, do the final check as close to parking time as practical. Water can continue to drain from mirrors and upper door areas after the first wipe, especially after a high-pressure wash. A second quick pass around the seals and handles after the drive home can catch those delayed drips before they freeze.
Check the weather forecast before washing when a rapid temperature drop is expected. A wash completed just before a sharp overnight freeze gives trapped water less time to evaporate or drain. If possible, wash earlier in the day or postpone until you have enough time to dry the seals thoroughly and recheck them later.
If the vehicle has remote-start or cabin preconditioning, use it only as the manufacturer intends. Warming the cabin can help soften ice around door openings, but it does not replace drying seals after the wash. Treat preheating as a backup convenience rather than the main prevention method.
Door-freezing problems are usually caused by moisture left where rubber seals, latch components, and body edges meet. That is why a winter wash can look perfectly dry from several feet away while still holding enough water to freeze a door shut overnight. The risk increases when temperatures fall quickly after the wash or when the vehicle is parked outdoors in wind. Paying attention to the hidden contact points around the opening gives a better result than simply drying the exterior sheet metal. The same principle applies to fuel doors, trunk seals, hatch openings, and frameless windows, all of which can trap water in narrow gaps that cool faster than broad painted panels.
Frequently Asked Questions
Why do car doors freeze shut after a wash?
Water can remain between rubber weather seals, around handles, or inside latch areas and then freeze as the temperature drops. The ice bonds surfaces that normally separate easily. Cold wind can accelerate freezing before trapped water has time to drain.
Drying those specific areas is more effective than only drying the visible exterior panels. Healthy, clean seals also release more easily than damaged or dirty ones.
Can I use silicone on door seals?
A product specifically made for automotive weather seals may be appropriate if your vehicle manufacturer permits it. Apply it to clean, dry rubber and use only the amount directed by the product. Random household oils or heavy lubricants can collect dirt, stain surfaces, or be incompatible with rubber.
The first defense should still be physically drying the seals after a wash. Treatment is maintenance, not a substitute for removing trapped water.
What should I do if a door is already frozen shut?
Do not yank the handle repeatedly or pry the door with a hard object. Try another door, warm the vehicle gradually, or use a de-icing method approved for automotive use. Gentle pressure around the door perimeter may help break a thin ice bond without damaging the seal.
Avoid pouring very hot water on the door because it can refreeze and may stress glass or finishes. If the latch itself is frozen, use a product intended for locks or latches and follow the directions.
Do frameless windows need extra attention?
Yes, frameless-door vehicles can be especially sensitive because the glass often moves slightly when the door opens. Ice at the glass edge or seal can prevent that movement and strain the mechanism. Dry the top and side edges of the glass carefully after washing.
Follow the vehicle manual for cold-weather operation of frameless windows. Do not force the door if the glass is visibly frozen to the seal.
Will driving after the wash stop the doors from freezing?
Driving can move some water out of mirrors and body gaps, but it does not reliably dry door seals and latch areas. Airflow may even cool wet surfaces quickly in very cold weather. Wipe the seals and jambs directly before leaving the wash.
After a short drive, check for new drips if you have a safe place to stop. Direct drying is the main preventive step.
Conclusion
The easiest frozen door to deal with is the one that never freezes. Dry seals and latches immediately after winter washes, maintain clean rubber, and give trapped water time to drain before the temperature falls.